A fun, eco-friendly DIY project for creative indoor play
Introduction
A kids cardboard castle is one of the best ways to combine playtime with creativity and sustainability. It turns ordinary boxes into extraordinary adventures.It combines creativity, recycling, and hands-on learning—all while providing children with a space to explore their imagination. Whether you’re looking for a rainy day activity or a birthday party feature, this cardboard castle project is a perfect fit.
According to National Geographic Kids, recycling crafts like cardboard castles help children learn about sustainability in a fun and interactive way.
Why Cardboard Castles Are a Great Idea
Cardboard castles are not only fun to make, but they also offer several benefits:
- Encourage imaginative play and storytelling
- Teach basic construction and problem-solving skills
- Reuse recyclable materials in a creative way
- Create a custom indoor play area at no extra cost
Materials You Will Need
Before you start, gather the following items:
- Large cardboard boxes (appliance or moving boxes work best)
- Scissors or a box cutter
- Hot glue gun or strong tape
- Ruler or measuring tape
- Pencil or marker for outlining
- Paints, stickers, or colored paper (optional, for decoration)
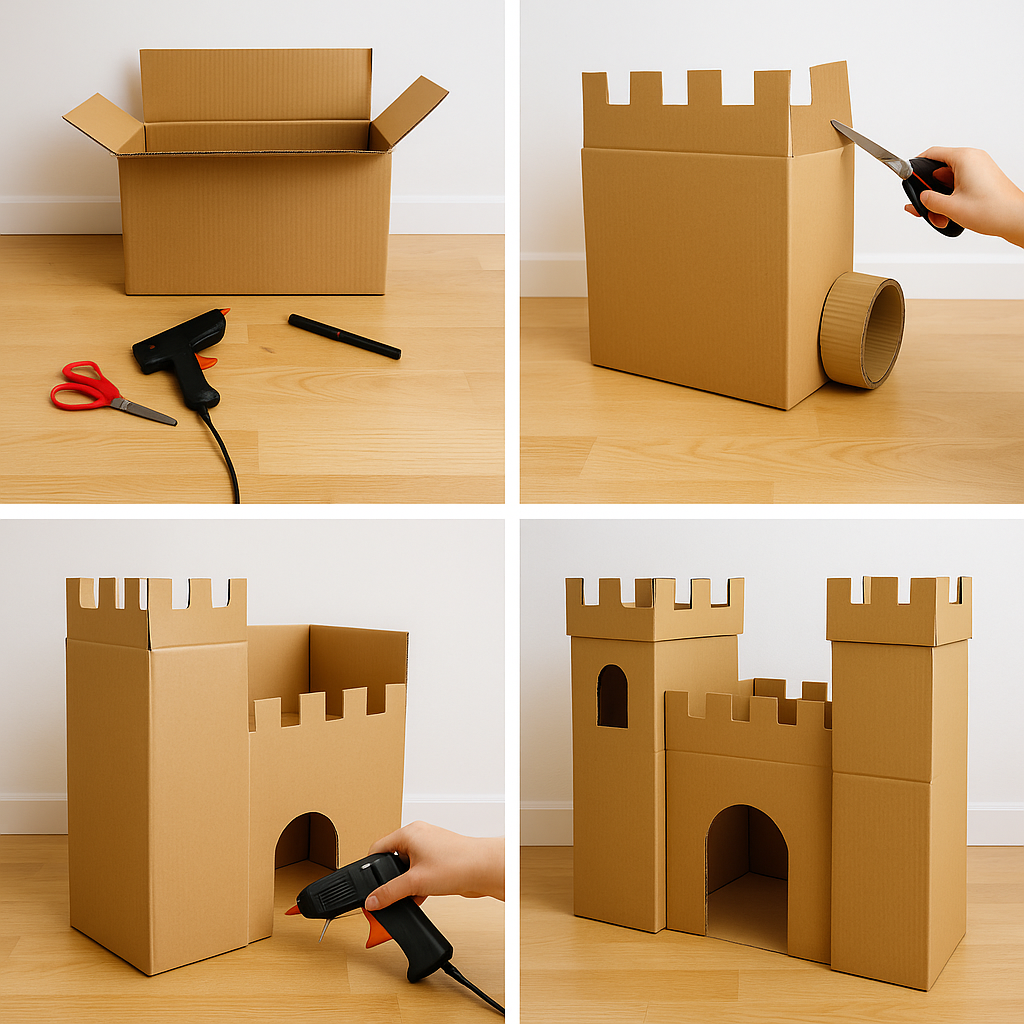
Step-by-Step Instructions
1. Plan Your Castle Design
Sketch a simple layout of your castle. Decide how many towers, walls, and doors you want. Consider the available space in your home where the castle will be used.
2. Cut Open and Shape the Boxes
Open up the boxes and cut out the walls, turrets, and towers according to your design. Use a ruler to keep edges straight and symmetrical.
3. Assemble the Main Structure
Use tape or hot glue to connect the walls. Start by creating the main square or rectangle for the base of the castle. Attach towers or corner sections next.
4. Add Windows and Doors
Cut out arched windows and a large castle-style doorway. Make sure edges are smooth to avoid any safety issues for kids.
5. Reinforce the Structure
For extra strength, add additional cardboard strips inside corners and joints. This helps keep the castle stable during play.
6. Decorate the Castle (Optional)
Let kids paint the castle in gray or stone patterns. Use paper flags, draw bricks with markers, or add dragons, shields, or stars for a fantasy feel.
7. Make It Interactive
Add flaps for secret doors, a drawbridge made with string and cardboard, or even turn parts of the castle into storage for toys.
Safety Tips
- Always supervise kids during cutting or assembly
- Use blunt-tip scissors for children
- Avoid sharp or unstable edges
- Place the castle on a flat surface for balance
Educational Benefits of This Project
Building a cardboard castle encourages:
- Fine motor skill development
- Teamwork if done in groups
- Creative problem-solving
- Artistic expression
- Environmental awareness through recycling
If your child loves hands-on crafts, check out our https://toptipshub.com/recycled-cardboard-drawer-organizer/ for another fun project.
Conclusion
A kids’ castle made from cardboard boxes is more than just a fun craft—it’s an opportunity to bond, teach, and create something meaningful together. With simple tools and a little time, you can turn recycled materials into hours of imaginative play.